In our rapidly evolving digital landscape, the ability to maintain and repair your own devices is more than a cost-saving measure; it is an empowering skill that connects you to a community of innovators. With advancements in technology, device modifications and repairs have never been more accessible and effective. Empowering yourself with the right knowledge and tools can extend the life of your devices, minimize waste, and help you keep up with evolving tech trends.
This article provides a comprehensive guide that combines state-of-the-art techniques with classic DIY wisdom to help you tackle maintenance challenges head-on. Whether you are replacing a cracked screen or upgrading your battery, every repair is an opportunity to not only save money but also to become more self-reliant in a world dominated by proprietary technology.
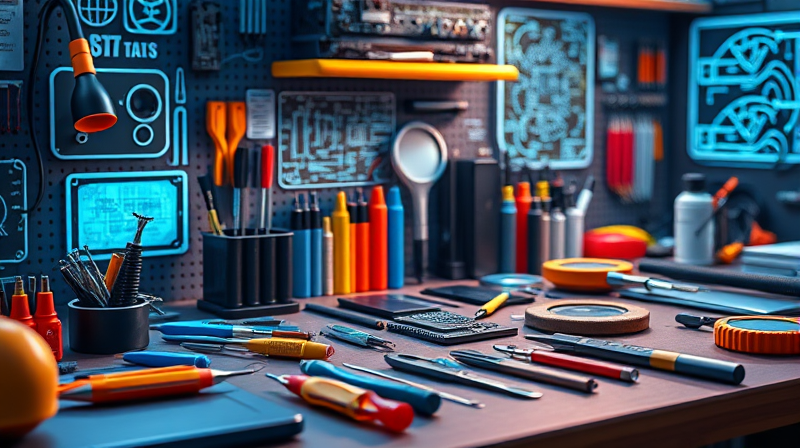
Essential Tools for Device Repair
To begin your DIY journey, it is crucial to build a toolkit that empowers you to handle common repairs with confidence. The right set of tools is the cornerstone of any successful maintenance project.
Precision Screwdriver Sets: A variety of devices, particularly smartphones and laptops, require special screwdrivers for disassembly. A comprehensive set that covers all variations is indispensable in your toolkit.
Pry Tools and Spudgers: These tools are perfect for gently opening cases, disconnecting fragile connectors, and ensuring that you do not damage any components during the process.
Precision Tweezers: Handling tiny screws or minute electronic parts calls for tweezers designed specifically for precision tasks. Their multiple shapes, including straight and pointed designs, make them a must-have.
Suction Cups: For components like screens or back covers, suction cups create a vacuum seal that makes the separation process safer and more controlled.
Heat Sources: Devices often contain components that are attached with adhesives. Whether you use a hot air gun or a hair dryer, the right heat source can soften these adhesives, making removal easier. It is essential, however, to apply heat cautiously so that you do not compromise the integrity of your device.
ESD Wrist Straps: When working with sensitive electronic components, static electricity is a significant threat. Using an ESD wrist strap minimizes the risk of damage from static discharge and is a simple way to ensure your safety and that of the device.
Innovative Diagnostic Techniques
Before diving into repairs, a precise diagnosis is integral to success. 2025 has seen significant improvements in diagnostic technology, making it easier than ever to pinpoint issues.
- Repair Software: Advanced software tools now analyze device logs, performance metrics, and even predict potential hardware failures. This facilitates swift and accurate diagnosis.
- Voltage Testers and Multimeters: These tools help you understand any power-related issues before you start disassembling your device, ensuring repairs are done safely.
Taking the time to properly assess the issue not only saves you time but also prevents further damage to your device, paving the way for a more effective repair process.
Step-by-Step Repairs and Maintenance
From screen to battery replacements, understanding each repair step creates a clear and manageable pathway for DIY enthusiasts. Home repairs are an opportunity to hone your skills while saving money.
Screen Replacement:
- Use prying tools with caution to open the device.
- Gently detach the damaged screen from its housing.
- Install the new screen, making sure to align all connectors and components properly.
- Reassemble the device carefully, referring to the disassembly photos taken during your repair process.
Battery Replacement:
- Open the device using the correct tools to ensure you do not harm other components.
- Carefully extract the old battery, paying attention to any connectors or clips.
- Place the new battery correctly and double check that it is secure and aligned.
- Reassemble your device, ensuring all seals are intact to prevent dust or moisture entry.
Regular maintenance is as crucial as major repairs. Following a simple checklist can prevent unforeseen issues in the future.
- Identify Assets: Keep a detailed list of all devices requiring maintenance.
- Define Maintenance Tasks: Tailor specific tasks for different devices to ensure their longevity.
- Establish Frequency: Different devices require maintenance at varying frequencies depending on usage and environmental factors.
- Assign Responsibility: If you share maintenance duties, make sure responsibilities are clearly defined.
- Create a Checklist: Document each task to avoid overlooking essential steps, ensuring routine upkeep is streamlined and efficient.
These simple practices promote a proactive approach to DIY device care, reducing the need for emergency repairs and extending the life of technology investments.
Proven DIY Success Tips
Adopting a mindful, organized approach is key to successful repairs. Many DIY enthusiasts have discovered that preparation is half the battle.
Organization is critical: Keep all parts and tools well-organized. Label small components and store them safely so you can easily locate them during reassembly.
Document every step: Taking photos during disassembly helps ensure that each step can be retraced during reassembly. This step-by-step record can be invaluable, especially when working on unfamiliar devices.
Create a dedicated workspace: A clean, well-lit area not only enhances precision but also minimizes the risk of losing small parts. This space also helps in maintaining focus when addressing challenging repairs.
Backup essential data: Before tackling any major repair, ensure that all important data is backed up. This prevents unnecessary data loss and provides peace of mind during potentially complicated tasks.
The true power of DIY repairs lies in your ability to learn from each experience and share that knowledge with others, creating a vibrant community of informed tech enthusiasts.
Recognizing When Professional Help is Needed
No matter how advanced your DIY skills are, there are times when professional intervention is the best decision. Complex issues, like water damage or intricate motherboard repairs, may require specialized equipment or expertise.
Understand your limits: If a repair seems beyond your comfortable skill set or involves dangerous components, trusting a professional can save time and further damage. Additionally, if your device is still under warranty, attempting a self-repair might void the guarantee.
The decision to seek professional help is not a sign of defeat but a recognition that sometimes technology requires expert attention.
Ultimately, DIY device care is much more than a series of repair tasks—it is an inspiring journey towards greater self-reliance and a deeper understanding of the technology that powers our lives. Embrace the challenges, and let each repair be a testament to your growing expertise and ingenuity.